Showing posts with label Bread and Cake Recipes. Show all posts

Saturday, May 12, 2012

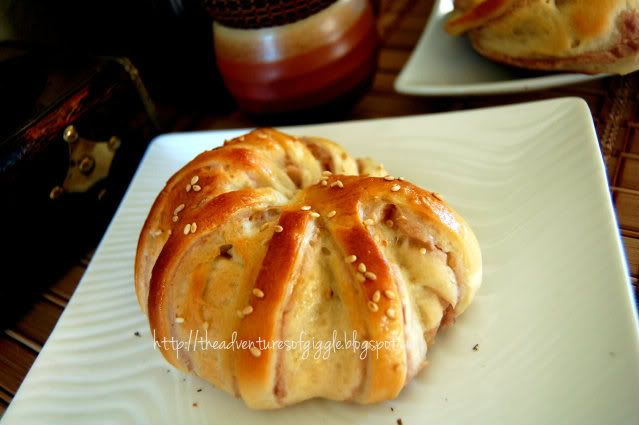
台湾香肠面包, 芋泥面包,Kaya面包 (汤种面团)

 DSC_0965

大家好, 好久没有po文了。

话说玫雅超爱吃面包的, 是时候从出江湖了。 先来几款甜面包暖身暖身吧。。

用的是汤种面团。
上面先出场的是台湾香肠面包 一个面包用一条香肠有点奢华, 切小块, 加几个蒜泥, 撒点葱花做点缀。。。好好吃哦。。。满足!!


再下来是芋泥面包, 外面卖的甜死人不偿命。 芋泥自己动手做, 不加香剂, 吃得放心。
 DSC_09272

最后一个是 Kaya包
 kayabread
 Lee Lee 去年开始有卖新鲜的班蓝叶了, 以前用的是不必用钱买的, 现在一磅要美金4块多。。。犹豫了一年。。。还是熊熊给买回来做kaya。。。用的是罐头椰浆, 味道还可以, 可是还是比不上新鲜挤出来的。 现在就等着什么时候有卖新鲜椰浆。。。。那时候真的要放鞭炮庆祝了。


Monday, October 18, 2010

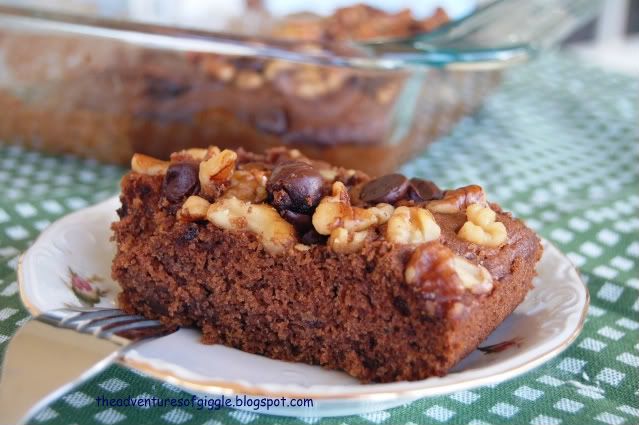
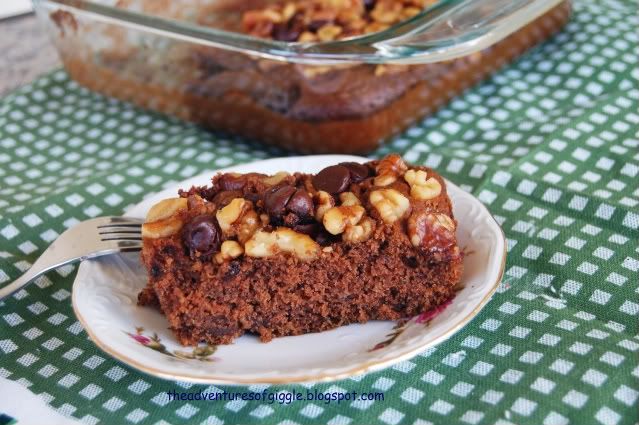
Chocolate Zucchini Cake

Photobucket

On of my colleagues, Janet, made this cake for our front desk lady's birthday. I was curious how would it taste. Surprisingly, I fell in love immediately right after I had the first bite. The cake was moist but not greasy, not too sweet. I thought Tom may like it too. I am so thankful that Janet was willing to share the recipe (from Mary) with me. I seized a short break to make this cake yesterday, it was quick and easy. Tom loves it. Both of us finished it in just 2 days.
I may try to use banana in my next attempt, I think it will taste great too. I used glass bakeware this time, I think it would be dry at the edges if using steel bakeware. So, you may have to adjust the heat and time if you are using different bakeware.

昨天忙里偷闲做了这蛋糕, 真的好好吃吔....不油腻, 吃了不会有太大的罪恶感. 做法简单又快速, 以后会常做来吃. 下次做的时候会尝试用香蕉来代替 Zucchini ,我想味道也一样棒吧?

Photobucket

A)
1. 1/2 C butter
2. 1 3/4 C sugar (I used 1 1/2 C brown sugar)
3. 1 tsp vanilla
4. 2 1/2 C flour
5. 4 Tbsp cocoa powder
6. 1 tsp soda
7. 1/2 tsp baking powder
8. 1/2 tsp cinnamon
9. 1/2 C vegetable oil
10. 2 eggs
11. 1/2 C sour milk (add 1/2 tsp vinegar to milk to sour)
12. 1/2 tsp salt
13. 1/4 tsp cloves (I omitted it because I don't have it in my pantry, still taste good though)

B)
1. 2 C grated zuchinni

C) Topping (adjustable to your personal liking, the cake itself is not that sweet, I like it better with the sweetness from the chocolate chips topping)

1. 1/2 C ~ 2/3 C semi-sweeten chocolate chips
2. 1/2 C chopped walnuts
3. 1/2 tsp cinnamon (omitted because I'm not a big fan of cinnamon)
4. 1/2 brown sugar (omitted, I like it with more chocolate chips)

Steps :

1. Preheat the oven at 350F.
2. Mix all the ingredients A together.
3. Fold in grated zucchini.
4. Pour into un-greased 9 X 13 glass bakeware.
5. Mix together ingredients C, sprinkle over top of the cake batter.
6. Bake at preheated oven for 40~45 minutes. (Adjust accordingly if you use steel bakeware)

Happy baking! :-)

Friday, January 29, 2010

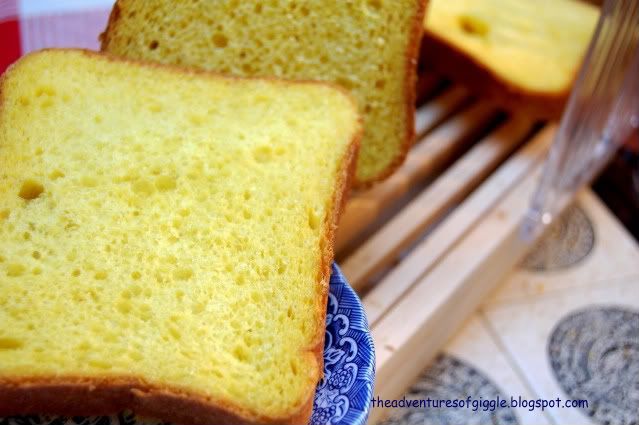
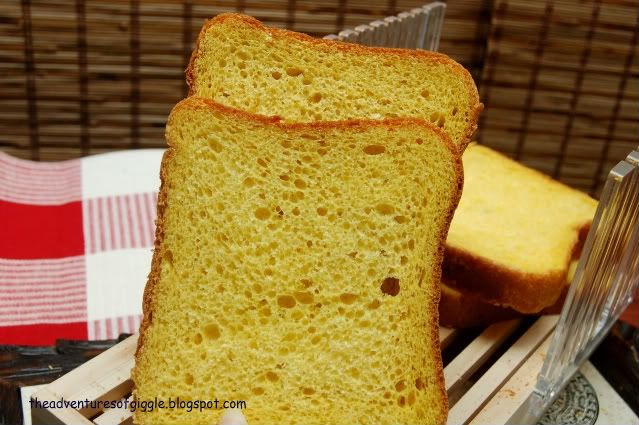
Pumpkin Toast

Photobucket

Not having enough time to cook and write too much. Just wanted to share something quick I have made yesterday. :-) It is soft and fluffy... I love my bread machine!lol!!


Ingredients:
1. 173g water
2. 35g lightly beaten egg
3. 35g butter - cut to small cubes
4. 4g salt
5. 20g sugar
6. 345g bread flour
7. 3g instant yeast
8. 90g room temperature mashed pumpkin

Method
1. Put all the ingredients except mashed pumpkin into the bread pan in order listed above.
2. Select basic regular function and press start. Add in mashed pumpkin 1 minutes later after the machine started.
Photobucket

Wednesday, December 2, 2009

3.30a.m Bread

Photobucket
I'm back!!!!!!!Tired!!!Exhausted!!!

Many people are wondering why did I take such a short trip back to Penang. The main purpose for this trip was bridal photo shooting. We had to save some vacation time for next longer trip for the wedding ceremony. I know it sounds weird. We should have it done long time ago. But due to the visa, green card restrictions, working problems, vacation timing...etc, and also I didn't find the right bridal shop earlier, so......"sigh" long story!!
The second night we got home, I woke up at 3.30am and couldn't get back to sleep anymore. We had not got a chance for grocery shopping yet, so, I made an easy bread with my bread maker for Tom's breakfast. Both of us finished the whole loaf of bread in that morning.

The texture of this bread is similar to "Bengali Roti" in my home country, light, soft!! Best eaten with soft boiled egg.

I am still un-packing and cleaning, but will slowly catch up my blogging...! Stay tuned ya!!

Photobucket


Recipe for the bread (use basic regular function) :

1. 150g water
2. 25g egg
3. 25g salted butter - cut to small cubes
4. 13g sugar
5. 3g salt
6. 250g bread flour
7. 3g instant yeast.

Method :
Put all the ingredients into the bread pan in the order listed as above (DO NOT let yeast directly contact with salt and liquid). Select basic regular function, press start. The bread will be ready in 2 hours 40 minutes.

Monday, October 5, 2009

Grilled Chicken Calzone

Photobucket

Tired of pizza? Lets try some calzones! It is an Italian turnover made from pizza dough stuffed with fillings like cheese, ham, vegetables or other varieties of ingredients. I had my first calzone many years ago, it was stuffed with baby spinach and cheese. I liked it so much but didn't know what was it called because back at that time, I was still very new to western meals.

Photobucket

I described what it looked like to Tom recently and he told me it is "calzone". I immediately checked it out from wikipedia and found that it is quite simple to make.
Since I had some leftover canjun style grilled chicken, I decided to make some grilled chicken calzone with my pizza dough recipe. It turned out great. :-)

Photobucket

Here are the ingredients and steps :

1. 1 Pizza dough cut to 4 portions (please click here for pizza dough recipe)

2. Filling (according to your preference)
a) Canjun grilled chicken - cubed
b) Grilled green pepper and onion - sliced or cubed
c) some shredded cheddar cheese and mozzarella cheese
d) pizza sauce
e) some black pepper
f) some butter
g) some Parmesan cheese powder

Steps :

1. Pre-heat the oven at 450F
2. On the floured surface, roll each portion of the pizza dough to approx. 6" circle.
3. Spread about 1.5 tbsp pizza sauce on the half circle, leave about 1/3 edge.
4. Add in chicken, pepper,onion slices shredded cheeses, sprinkle some black pepper.
5. Fold dough over filling to form a half moon shape.
6. Seal the edge with a fork.
7. Baked in preheated oven for 30~35 minutes or until it turns golden brown.
8. Sprinkle some Parmesan cheese when serve (optional)

Friday, August 14, 2009

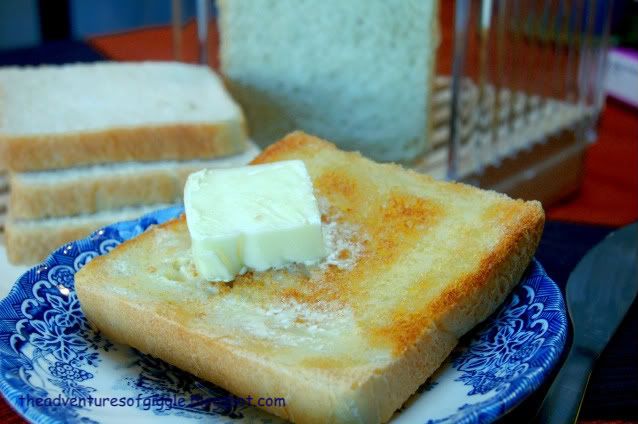
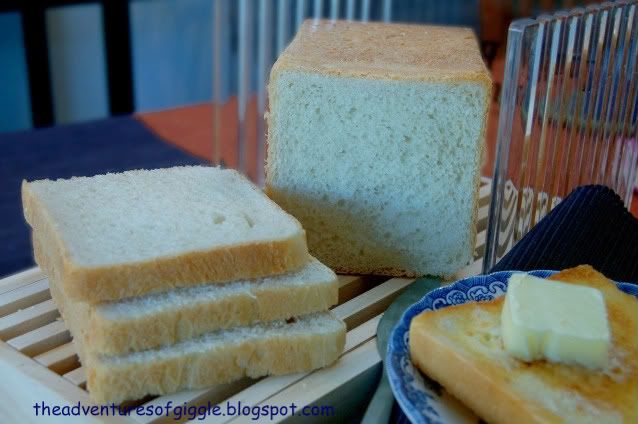
Homemade White Bread (Pain de Mie)

Photobucket

I really love the fresh baking aroma from the oven spreading in my house. Plus a cup of fresh brewed coffee, oh gosh!! Just like being in the heaven! lol!!


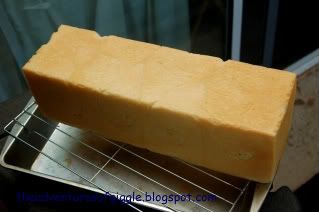
I am a bit picky about the shape of my bread. I don't like the shape of the bread pan that came with my bread machine. Tom helped me to get a new square bread pan with lid from Amazon (editor's note: This is called a "Pullman Loaf Pan." You buy a slide-on lid to make the square "sandwich bread" loaves). Its weird, we had to order it online, we couldn't find it from the major supermarket or retailer stores here.

Photobucket

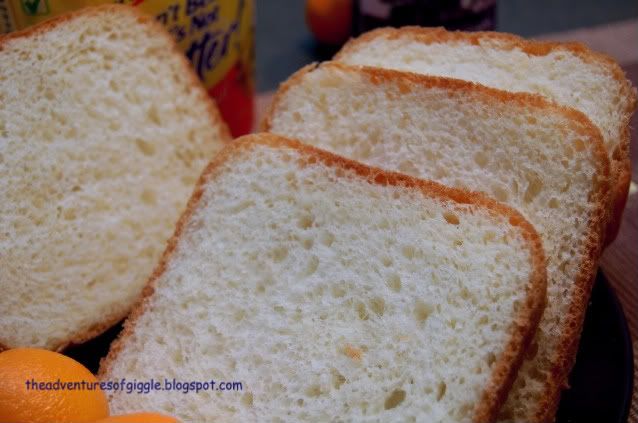
There are so many bread recipes out there. I am still new to bread making, so for safety, I started with a very basic white bread recipe (editor's note: This is technically called "pain de mie"). It turned out great! Cottony soft inside. I am glad that I have everything for a fresh and healthy homemade bread now. I was really concerned about consuming too much bread improver - a common ingredient for those bakery shop to make nicer looking or texture bread/bun. I don't have worry too much about this now. yay!!!

Here's my recipe I would like to share, it is really simple for a new bread baker. Try it out! :-)
(editor's note: Best "white bread" ever! Can't wait for raisin bread!!!)

For a 4" X 4" X 13" Bread Pan

1. 350~360ml fresh warm milk (100~110F) - volume is to be adjusted according to the moisture of the dough.
2. 1tbsp sugar
3. 1 pack (7g or 21/4tsp) active dry yeast
4. 40g butter - melted (I will add up to 60g in my next attempt as I like the taste of butter a lot)
5. 1 .5 tsp salt
6. 510g all purpose flour

For bread machine baker
1. Pour the warm milk in the pan, dissolve sugar and yeast in warm milk. Let is rest for 5 minutes.
2. Add in flour and salt, select dough function and press start.
3. Add in butter after 4 minutes of mixing.
4. I shorten the mixing and kneading process, I just let the machine run for 25 minutes.
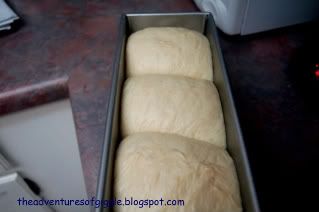
5. After 25 minutes, turn off the power. You may rise the dough in the machine or remove it to a lightly greased bowl, cover with plastic film and rise for 1 hour in warm (85F) place or doubled in size.
6. Punch the dough down with your fist, divide to 3 or 4 portions. Let them rise for 10 minutes.
7. With a rolling pin, flatten the dough to approx. 4" wide, 12" long, roll it from short side like a swiss roll, place it in the bread pan. Repeat the same to the rest of doughs.
8. Cover with plastic film, let it rise for another 45~60 minutes, or until it is 90% up the way to the top of the pan.
8. Bake with lid on at preheated oven (350F) for 35~38 minutes.
9. Once its done baking, remove the bread from the pan immediately and cool it on a wire rack.

For hand kneading baker
1. Dissolve sugar and yeast in warm milk in a large mixing bowl, let it rest for 10 minutes.
2. Add butter and flour into yeast mixture, stir until well it form a dough. Turn dough out to a floured surface.
3. Knead until smooth and elastic (about 10~15 minutes)
4. The rest of the steps will be same as machine baker #5~#9.

Ready to bake!
Photobucket

Fresh from the oven!
Photobucket


Saturday, August 8, 2009

Summerberry Muffin

Photobucket

It has been a busy week. Didn't get the chance to bake or cook. Its good though, our stomachs needed to take a break after so many heavy meals recently.

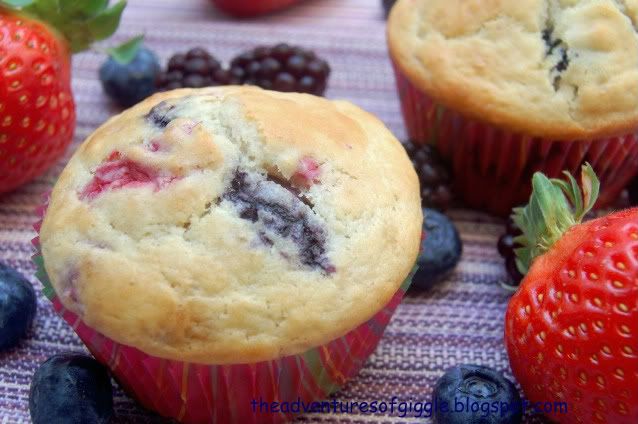
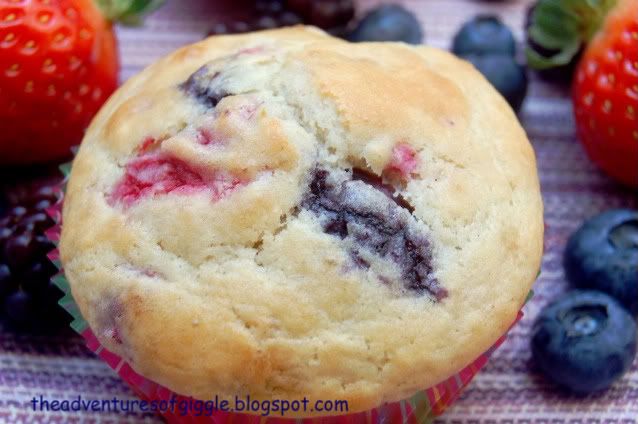
I was thinking to bake some mixed berry stuff as I have all kinds of berries sitting in my refrigerator - I use them for making my smoothies every day. My first thought was to bake a mixed berries sandwich cake, but the heat here makes me too lazy to move, so here I come with my simple summer berry muffin recipe. Its a fast and easy bake. Hope you like it.

Photobucket

Ingredients :

1. 180g all purpose flour
2. 50g sugar
3. 2 tsp baking powder
4. 1/4 tsp salt
5. 2 eggs
6. 55g butter - melted
7. 175ml fresh milk
8. 1 tsp vanilla extract
9. 1/2 tsp fresh grated lemon zest
10. 180g fresh or dried mix berries
( I mixed up with 1 ripe strawberry - cut to small cubes, some raspberries - cut to smaller cubes, some blueberries)

Steps :
1. Preheat the oven at 400F/200C
2. Sieve all the dry ingredients into a mixing bowl.
3. In another bowl, whisk the eggs until blended.
4. Add the melted butter, milk, vanilla and lemon zest. Stir to well combined.
5. Make a well in the dry ingredients, and pour in the egg mixture.
6. Stir the batter with a spatula just until the flour is moistened, not until smooth.
7. Fold in mixed berries.
8. Scoop the batter into the muffin cups.
10. Bake for 20~25 minutes.

Sunday, August 2, 2009

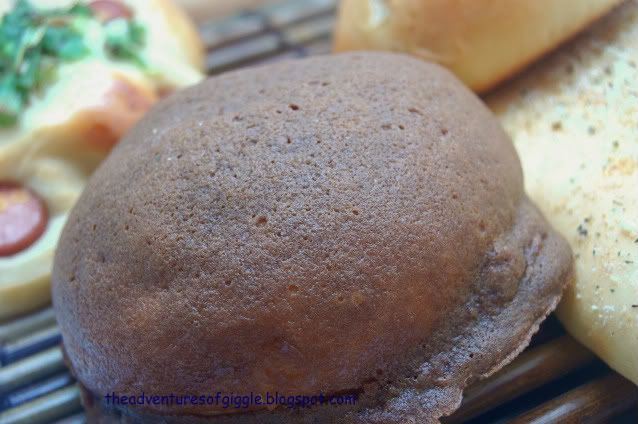
Mexico Bun - Water Roux (汤种) Starter Bun Dough

Mexico BunDon't ask me why is this call Mexico Bun. I believe all the Mexican people here have no idea what is this. I have not seen this bun been sold in the bakery shops here, where the place closer to Mexico. Weird huh?? LOL!!

In order to get the best result of my bun making (softest and longer lasting freshness), I keep trying out different kind of dough recipes, I believe that by trial and error, I will improve the technique and knowledge of the dough handling.

I have learned about this water roux (汤种) long time ago. Today, I finally got the chance to try it out, I think I have found the best sweet bun dough so far, you may use the same dough for savory filling or topping, the texture and softness of the buns are exactly the same you could get from the bakery shop.
Photobucket

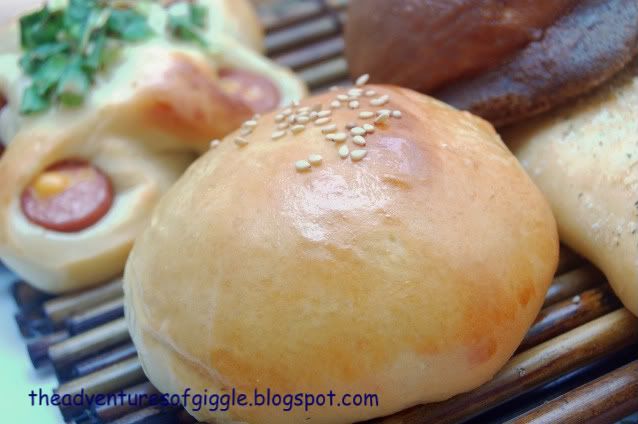
Besides Mexico Bun, I also made some BBQ pork bun with the left over filling from the char siu bao I made the other day. Of course, can't miss hot dog onion buns too, it's our favorite now. lol!! Please refer to my older posts for the filling/topping recipe of BBQ pork, Parmesan Oregano sticks and Hot Dog Onion. I will only post the dough making and Mexico bun topping recipe in this post.

Photobucket
Assorted bun again...

The making of the water roux is not as complicated as I thought. Following are the recipe and steps I would like to share, please try it out and see if this is the one you have been long looking for.


A) Water Roux Starter (make 125g starter)
i) 25g bread flour
ii) 1/2 cup water (approx. 150ml or 125g)
** The ratio (based on weight) of the flour and water should be 1 : 5 **
Steps of making water roux starter :

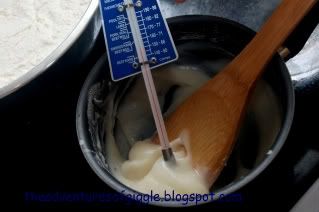
1. Mix the flour and water in a non-stick sauce pan until well blended (lump free).
2. Cook it over medium low heat (stir continuously) until the mixture reaches 65C (approx. 149F).
3. Remove the pan from heat immediately, cover with plastic film and let it cool to room temperature.

** If you don't have the thermometer to measure the mixture while cooking, the estimated cooking time is about 2~3 minutes, the mixture should be thicken by then (the texture is like the egg and flour mixture of sponge cake batter). **
Photobucket
Temperature and texture of the water roux.

B) The Bun Dough Ingredients :

i) 350g bread flour
ii) 100g all purpose flour
iii) 35g milk powder
iv) 55g sugar
v) 1/2 tsp salt
vi) 10g instant yeast.
vii) 2 egg(100g) - lightly beaten.
viii) 135g water
ix) 45g unsalted butter


Steps (I tried my best to describe the process with the bread machine method and hand kneading method) :

1. Sieve together all the dry ingredients except yeast.
2. For bread machine user, pour in ingredients in sequence - water, egg then flour mixture.
3. Form a small well (not too deep to the liquid ingredients), add in yeast.
4. Select the dough function and press start.
5. After 5~6 minutes of mixing (the mixture should be crumbly now), add in water roux starter.
6. About 15 minutes later, add in butter and let the machine continue to run.
7. The whole mixing and kneading process is 30 minutes.
8.This time, I let the dough rise in the machine for 1 hour after it stopped kneading. Due to the dry weather here, I placed a damp tower on top of the bread pan, and cover with lid.
9. Alternatively, you may remove the dough from the machine, and rise in a lightly greased mixing bowl, cover the bowl with plastic film, rise at temperature 78F/28C for 1 hour.
10. After one hour, test the dough by poke it down with your finger, if it does not bounce back, means that you are ready to go, otherwise, rise until it reaches the condition.
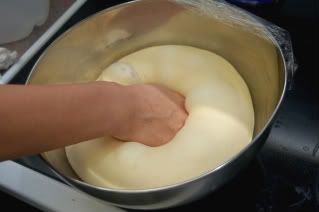
11. Punch down the dough with your fist to deflate the gas.
12. Divide it to your desired portions, roll each of them to a round ball.
13. Let them rest for another 10 minutes, then you can go ahead to shape what ever buns you like to make.
14. After shaping, let the buns rise for another hour at temperature 100F/38C. For most consistent results, I let them rise in an un-heated oven, put a bowl of boil water in the oven, close the door and let it rise until last 15 minutes, remove the buns and water when you preheat the oven.
15. Bake according to your recipe's instruction.
16. After its done baking, once you remove the baking sheet from the oven, transfer your buns to the cooling rack immediately, This is one of the IMPORTANT steps, as the heat of the baking sheet will make the bottom dry and hard.

For hand kneading baker :1. Sieve together all the dry ingredients on your working surface.
2. Make a small well in the middle of the flour mixture, slowly add in water, egg and water roux starter.
3. Knead for about 15~20 minutes, add in butter and continue to knead for at least 30 minutes. (To test if the dough has been kneaded enough, stretch a little of it, it should not tear off easily and looks translucent).
4. Place the dough in a lightly greased mixing bowl, cover it with plastic film, rise at 78F/26C for 1 hour.
The rest of the steps are the same as machine method - steps # 10~13.


C) Mexico Bun

1. Filing - 10g butter cube for each bun.

2. Topping :
i) 70~75g all purpose flour 70g first, add extra if necessary - I like it thicker, as it will create crispier topping after baking)
ii) 60g salted butter - soften in room temperature.
iii) 65g sugar
iv) 1 tsp coffee paste
v) 1 tbsp (add extra if you wish to have stronger taste) instant coffee dissolved in 1 tbsp water


Steps :
1. Whisk the butter and sugar until well blended.
2. Stir in coffee paste and liquid, mix well.
3. Sieve the flour into the mixture (sieve 70g first, add extra if the mixture is too runny, I like it thicker as it will result crispier topping after baked).
4. Stir to well combined (lump free). Refrigerate until needed.
5. Scoop the mixture into a icing piping bag.

Steps to make the buns :
1. Flatten the ball (the small dough portions that have been rested for 10 minutes), place a cube of butter in the middle, pinch and seal the edge.
2. Let the the buns rest for 1 hour.
3. Pipe (squirt on with cake decorating tube) the coffee mixture on top of the bun in a swirl pattern.
4. Bake at 375F for 12 minutes. (Different oven will give different result, I adjust it by trial and error, this is the best temperature and timing for me).
5. Remove the buns from the oven and transfer them to the cooking rack.
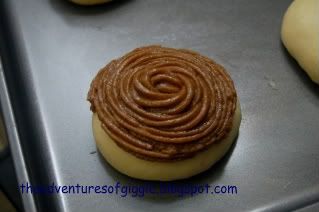
PhotobucketMexico Bun before baking.
Monday, July 20, 2009

Hot Dog Onion Bun, Blueberry Bun

Photobucket
I'm sooooooooooooooooooo happy!!! My first attempt to shape hot dog bun and it turned out so well, just like the one sold at the bakery shop!!

I just got a bread maker recently, it makes my life so much easier. I don't have to knead the hell out of the dough. You just have to get all the ingredients ready and let the machine do all the work.

Photobucket
Assorted Buns....

I have not tried the full function, just use the dough function to do the mixing and kneading process, then I remove the dough to a large mixing bowl. I will definitely make more bread with the full function of this machine in the near future, stay tuned ya!!!

Photobucket
Blueberry Bun.

For the dough base, it is a bit different from my bacon onion roll recipe as I was running out of all purpose flour, I substituted it with lesser amount of cake flour and increased amount the bread flour and milk powder. I increased the amount of sugar too as the last attempt was a bit too bland. Eventually, all turned out well, I will use this recipe as my bun making in future.

Photobucket
Fresh from the oven!

Photobucket
Bacon Onion Roll again!!! Our favorite, can't miss it! :-)


Photobucket
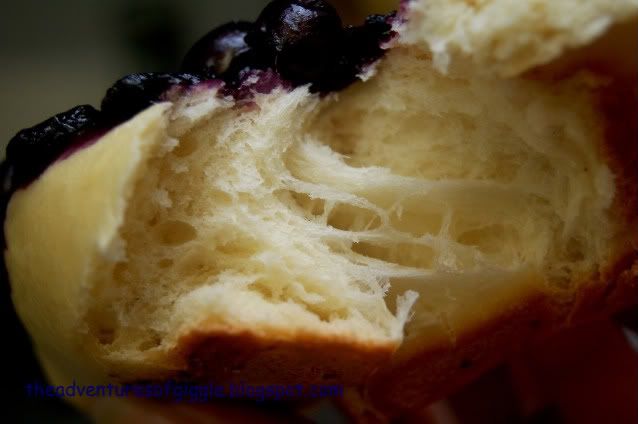
Inside texture, soft and moist...

Here are my recipes and steps, happy baking! :-)

A) Dough
1. 1 pkg instant yeast (7g)
2. 480g bread flour
3. 120 cake flour
4. 110g sugar
5. 10g salt
6. 25g milk powder
7. 300ml water
8. 1 egg
9. 60 unsalted butter - soften in room temperature

B) mix some egg yolk and milk to brush the surface before place in the oven

C) some butter to brush on the surface after remove the buns from the oven

Steps :
(If you don't have bread maker, please refer to my previous post - Bacon Onion Roll for the hand mixing and kneading steps).

1. Place all the liquid ingredients (water and egg) first to the bread pan of the machine.
2. Then add all the dry ingredients EXCEPT yeast.
3. Make a small well on the top of the dry ingredients (not too deep to keep yeast away from the wet ingredients, add the yeast to the well.
4. Select the DOUGH function and press start.
5. My bread maker takes - 6 minutes for first knead (mixing) and 24 minutes for kneading.
6. I added the butter after first knead.
7. When the kneading is completed, remove the dough into a large lightly greased mixing bowl (this is optional, I wondered my bread pan is not big enough for my rising).
8. Cover the mixing bow with plastic film, rise for 2 hours 30 minutes at warm (approx. 28C) and moist place (Arizona is too dry, I rose my dough in the oven-non heated, and put a bowl of boiled water in it).
9. The dough should be triple in size after 2.5 hours.
10. Punch the dough with your fist to deflate the gas.
12. Divide the dough to 60g balls (I didn't divide all, I kept some for my bacon roll making), round them with your hands.

D) For Hot Dog Onion Bun
i) 6 hot dog
ii) 1/2 cup of spring onion mix with 1/2 egg, pinch of salt and sugar, black pepper.

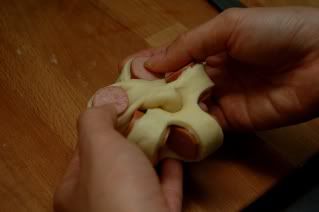
1.Flatten the dough A, roll up with a piece of hot dog.
2. Cut it (just cut through the dog)
3. Twist and shape it as picture shown, let it rise for another 50 minutes, cover with plastic film.
4. 15 minutes before rising time up, pre-heat the oven at 350F.
5. Brush the egg liquid #B
6. Top each bun with a spoon of onion mixtures.
7. Bake for 13 minutes
8. Remove the buns from the oven, lightly brush with butter for shinny effect.

Temperature and time are to be adjusted as different oven will bring different condition and result.

E) Blueberry Bun
i). 1/2 cup (or as needed) of homemade blueberry jam - recipe here.
If blueberry jam is not available, use blueberry pie filling and omit ingredient #ii below.

ii). Some fresh/frozen blueberries.
iii). Some icing sugar (optional)

1. Flatted the dough ball, roll it up.
2. Let it rise for 50 minutes.
3. Cut the middle of the dough with scissors
4. Brush with egg liquid B
5. Top with blueberry and jam.
6. Bake for 13 minutes.
7. Lightly brush with butter after remove from oven.
8. Sprinkle with some icing sugar on top of the buns. (optional)

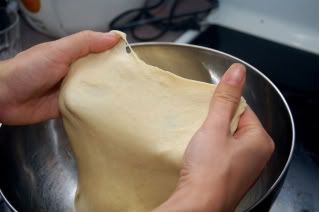
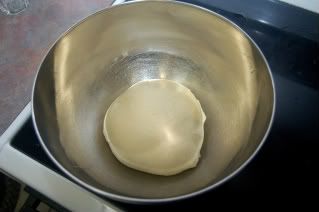
Stretch to check the texture after kneading --> size of dough before rise
PhotobucketPhotobucket

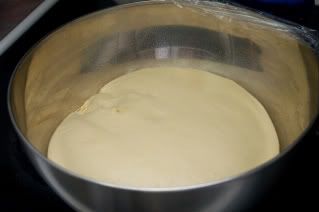
Size of dough after rose ---> punch to deflate the gas
PhotobucketPhotobucket

Hot dog bun making
twist and shapePhotobucket


Sunday, June 28, 2009

Blueberry Scones Recipe

Photobucket
Want something different for Sunday breakfast or high tea? Here's blueberry scones!!

Normally, I don't have to worry about what to eat for breakfast, Tom will fix it for us, bacon, omelet, over easy egg, muffins, orange.. etc. I have no complaint about that, he is our breakfast guy. LOL!!

Photobucket

Of course, I will make something different once a while, like Onion Bacon Quiche, banana muffins, bacon onion roll, and here they are - blueberry scones. They are best served with any fruit jam (I preferred mixed berry - I will post my home made mixed berry jam later), butter and honey!

Photobucket


It is a very simple and fast baking. Here's my recipe and steps, ENJOY!
Photobucket


Ingredients :

1. 1/2 stick frozen unsalted butter - coarsely grated (should be approx. 1/4cup) - keep in refrigerator until needed.
2. 1 cup all purpose flour
3. 1/2 tsp baking powder
4. 1/8 tsp baking soda
5. 1/4 cup brown sugar
6. 1/8 tsp salt
7. 1/4 cup sour cream (can substitute with 3 tbsp butter milk if sour cream is not available)
8. 1 egg
9. 2/3 cup fresh blueberry (or as needed) - if using frozen blueberry - DO NOT defrost.

Steps :

1. Preheat the oven to 400F.
2. Sieve the flour, baking powder and baking soda together.
3. Add sugar, salt and butter into the flour mixture, toss with folk to form fine crumbs or rub with your fingers.
4. In a separate bowl, whisk together the egg and sour cream/butter milk.
5. Fold in egg mixture into the crumbs with a rubber spatula.
6. Turn the dough on a floured surface, knead it very lightly for 15 seconds until it is well combined - DO NOT over knead. (The dough should be soft and moist).
7. Add in blueberries, lightly rub into the dough to mix well.
8. Divide the dough to 8~10 portion. lightly flatten it with your fingers.
9. Place them on a un-greased baking sheet.
10. Bake on the middle rack in the preheated oven for 15~17 minutes.
11. Serve warm with any fruit jam or butter.

Wednesday, June 24, 2009

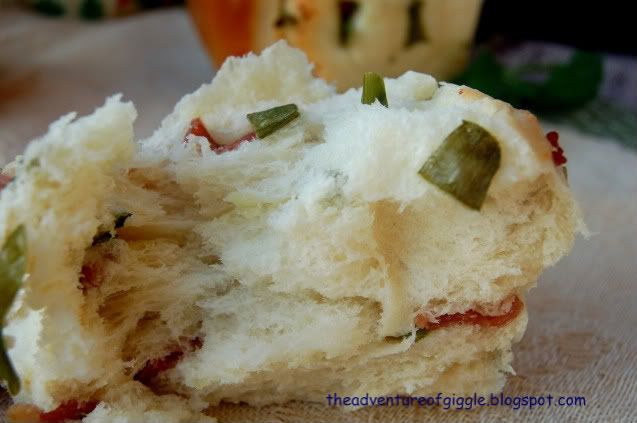
Bacon Onion Roll and Parmesan Oregano Bread Stick

Photobucket
You really need to try this out, soft and yummy!!

I wanted to bake some bread a long time ago, but always gave up because afraid of the kneading process. It is really time consuming. I will get a bread maker one day!

Photobucket
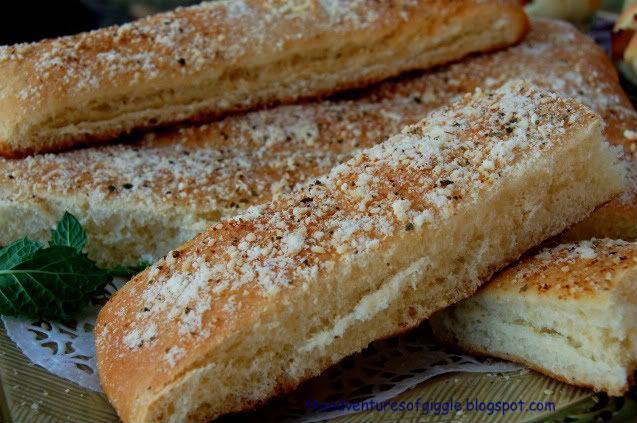
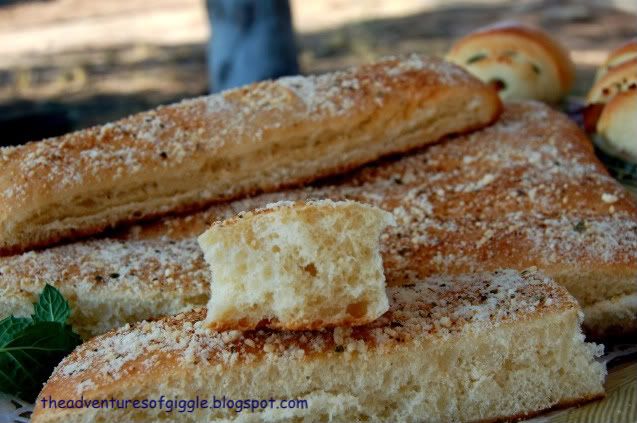
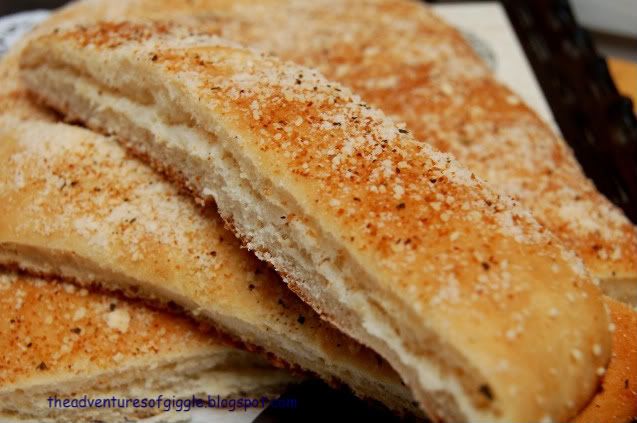
Parmesan Oregano Bread Stick

It is summer time, which is good temperature to let the bread rise. Today I felt in a good mood to bake some bread, so I quickly gathered all the ingredients and started to work on it.

Photobucket

This time, I used a different recipe. I split the dough for bacon onion roll and Parmesan oregano bread sticks - both turned out great, soft and yummy. Just feel like eating Pizza Hut or Dominos bread stick, love it!!!

Photobucket

Dough recipe :

A)
1. 150g all purpose flour
2. 450g bread flour
3. 20g low fat powder milk
4. 70g sugar
5. 10g salt
6. 4 tsp yeast
7. 300ml water
8. 1 egg

B)
1. 60g unsalted butter

Method :
1. Mix all the ingredients in A in a large mixing bowl. Use your hand to form a lumpy dough.
2. Turn the lumpy dough to your work surface and start to knead.
3. Knead until the dough is smooth and not grainy nor rough. It should feel smooth in your hands. It takes about 15 minutes or longer, depending how you knead it.
4. When the dough is satin smooth, add in the butter. Knead it well to let the butter incorporate fully into the dough.
5. Knead until it is non sticky (30 mins).
6. Stretch a little of the dough, it should not tear off easily and it feels like stretching a thin layer and looks translucent against the light.
7. Once the texture is reached, form it into a ball, leave it in a large greased stainless steel bowl cover with plastic wrap.
8. Put it in a warm place and proof for about an hour or a little more. It should double or triple in size.
9. Remove the dough, punch down to deflate gas inside.
10. Divide it into 2 balls. Let it rest for a further 10 minutes in the bowl, covered.

Photobucket


For Onion Bacon Roll
- 1/3 cup chopped onion
- 4 slices cooked bacon - crumbed
- some oregano flakes
- some garlic powder
- some salt
- some black pepper
- some parmesan cheese
>> mix all ingredients except parmesan cheese<< - egg white mix with some fresh milk for brushing. 1. Roll the dough into a rectangle piece, sprinkle the onion bacon mixture in the center part. 2. Sprinkle some parmesan cheese on top of it. 3. Roll it up like a swiss roll and fold down the two ends below. 4. Rest for another 45 minutes, cover with plastic wrap. 5. Brush the egg white mixture on top of them. 6. Bake for 12 minutes at Preheated the oven at 325F. Then turn to 350F to brown the surface for 2 minutes Photobucket
Texture of the roll


For Parmesan Oregano bread stick
- butter
- some oregano flakes
- garlic powder
- parmesan cheese
- salt

Photobucket

1. Roll the dough into a rectangle piece (about 1/3" thick,will rise thicker later).
2. Use the pizza cutter to cut 1.5" strips (widthwise)
3.
Rest for another 45 minutes, cover with plastic wrap.
4. Brush some butter on the surface.
5. Sprinkle oregano flakes, garlic powder, pinch of salt, parmesan cheese on top of it.
6. Bake for 13 minutes in preheated oven at 325F, turn to 350F for 2 minutes to brown the surface.

Saturday, June 6, 2009

Blueberry, Cherry Cheese Cake Petites

Photobucket

I have posted this recipe before, but the photo was not so presentable because I didn't know that I would start my own blog at the time the photo was taken.

Photobucket

I made these cheese cakes for a friends gathering dinner again yesterday, so I took some nicer pictures before they all got eaten.

Photobucket

I like to make this for parties because it is very simple, fast and presentable. Here's the recipe again.

Photobucket

A) Crust base
1. 40~45pcs of bite size (about 1 inch diameter) NILLA wafers (mini vanilla wafers) or any kind of mini digestive cookies (as long as it can fit into your baking cup/tray.)

B) Cream Mixture
1. 2 packs of 8oz Cream Cheese (room temperature)
2. 2/3 cup sugar (reduced)
3. 2 eggs
4. 1 tsp lime or lemon juice
5. 1 tsp vanilla extract
6. 1 tsp orange zest (outer orange peel, grated VERY fine - optional, I like it because with a little bit orange flavor in it, you won't feel too creamy to eat)

C) Topping
1. Blue Berry, Cherry Pie Filling.


Steps :

1. Preheat the oven at 325F.
2. Mix the cream cheese, sugar and egg with an electric mixer until well blended.
3. Add lemon juice, vanilla extract and orange zest into the cream mixture, mix well.
4. Place the mini paper baking cup in the mini muffin tray (24pcs per tray), lay each of them with a piece of wafer.
5. Spoon the cream mixture into each baking cup (not too full)
6. Bake for 15 minutes.
7. Remove the tray from the oven, cool at room temperature for an hour or two, refrigerate at least 6 hours, better if overnight.
8. Top with your preferred fruit topping and serve cool.
Related Posts Widget for Blogs by LinkWithin