Tuesday, March 31, 2009

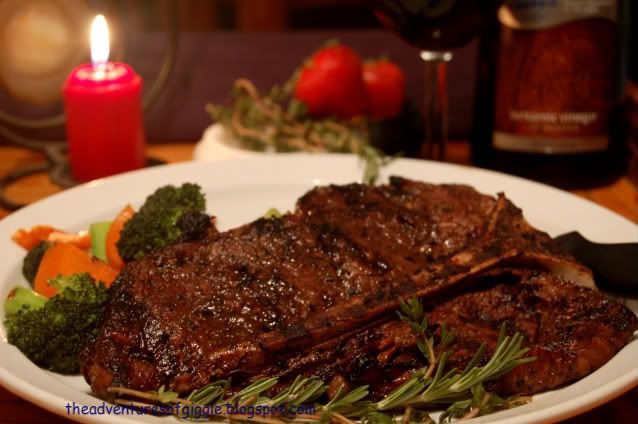
Balsamic Garlic Herb T Bone Steak

Balsamic Garlic Herb T Bone Steak

Since I have already made several times of Oriental Style Steak. It is time for me to invent another version --- more western style!! LOL!!

I feel that making steak is not that hard, sometime it can be simple just add the salt and pepper because the meat itself already tasteful and juicy. I am learning to use different kinds of western herbs like Oregano, Rosemary, Thyme, Basil, Parsley, Fennel...etc to make my culinary journey more interesting, not just simply add in "Italian Seasoning - mixed herb" when I make a western meal. It is good to learn the individual flavor of each of the herb, then you can always mix and match for creative recipes.
Photobucket

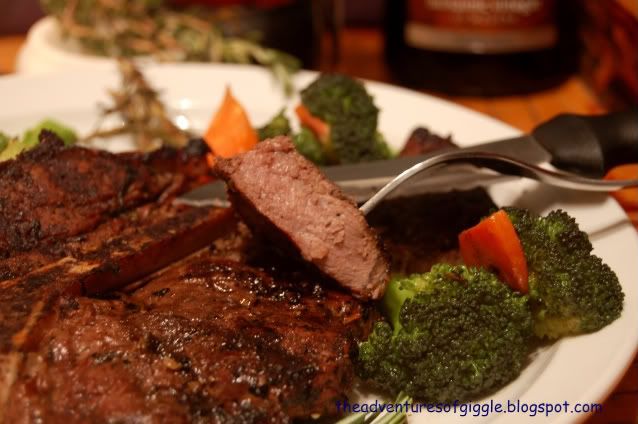
Tom likes this version very much, and so do I. I'm not a fan of "steak/red meat" person, so, I only grill 1 piece of steak for us to share. I usually just taste 2~3 bites and eat something else. When I made this "Balsamic Garlic Herb T Bone Steak" last few days, both of us ended up "scrambling" every bite of the steak. LOL!!!!!! It tasted heavenly!! The matching of the balsamic vinegar, garlic, rosemary and thyme is wonderful! This has already become my favorite seasoning. If you are not a "steak" person, maybe you can try this seasoning with poultry or salmon steak.

Ingredients and steps :

1. 2pcs 1" thick T Bone Steak (about 756g)
- seasoned with 3/4 tsp of salt and 1 tsp of fresh ground black pepper, set aside.

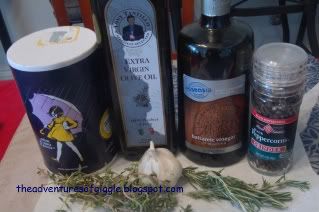
2. 2 tbsp Balsamic Vinegar
3. 1 tbsp olive oil
4. 6 cloves large garlic - diced
5. 4 sprigs fresh rosemary - finely chop 2 of them. Keep the other 2 sprigs intact for grilling.
6. 8 sprigs fresh thyme - finely chop 4 of them. Keep the other 4 sprigs intact for grilling.

Steps :

1. Combine the ingredient # 2~6 in a marinating container.
2. Rub the steaks with the marinating mixture, refrigerate for at least 3 hours.
3. About 1 hour before grilling, remove the steaks from the fridge. Discard the marinate mixture.
4. Heat up the outdoor grill.
5. Spray some Canola Oil on the grate, immediately place the steaks on the grate.
6. Grill about 8 minutes for each side for "medium". More or less, to taste.
7. About 3~4 minutes before it is done, place the rosemary and thyme sprigs between the grilling grate and steak.
8. Serve with some grilled or broiled vegetable.

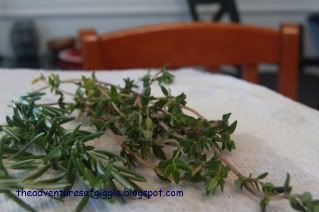
Marinate Ingredients...., Rosemary & Thyme
PhotobucketBalsamic Garlic Herb T Bone Steak


Monday, March 30, 2009

Banana Chocolate Cake

Banana Chocolate Cake
This is a "jump queue" posting. I still have many recipes lined up to post. But my friends - Lay Yin and Amy - were so excited about this recipe when they heard I made this cake. So I'm posting it first.

Banana Chocolate Cake

The first cake I had at Secret Recipe (about 8~9 years ago) was Banana Chocolate Cake, I chose this cake because I'm a big fan of chocolate (dark one). I swore that I would make this cake one day. Now I made it happen.

Banana Chocolate Cake


This is a "big" project, trust me, you got to be very patient and careful with the processes, then clean up the messes (Tom: "Or have someone to clean up for you!) But, all these are worthwhile and gratifying when it turns out satisfying. Isn't that feel amazing when you are able to make your favorite cake to your preferred taste? I am so happy now!! LOL!!!

Banana Chocolate Cake

OK, here are the ingredients and steps. HAPPY BAKING!!

A. Chocolate Chiffon Cake
1. 3 egg yolks
2. 98g cake flour - sieved
3. 60g sugar (original recipe - 75g)
4. 25g cocoa powder - mixed with 90ml water
5. 45ml vegetable oil
6. 1/3tsp baking soda - sieved
7. 1/3 tsp baking powder - sieved
8. 3 egg whites
9. 30g sugar (original recipe - 45g)

Steps :

1. Preheat the oven at 350F/180C.
2. Line the bottom of a 8" spring form cake pan.
3. Whisk ingredient # 1~ #7 until smooth. Set aside.
4. In a large mixing bowl, whisk the egg whites until foamy. Add in sugar and continue to whisk until stiff.
5. Fold in mixture # 2 into #3. Lightly stir with spatula to mix well.
6. Pour the cake mixture into lined cake pan.
7. Bake for 40~45 minutes.
8. Remove from the oven, invert the cake and leave for completely cool on the cooling rack.
9. Slice the cake to 3 layers horizontally.

B. Filling
1. 4 ripe banana - slanting cut to 4~5mm slices
2. 450ml whipping cream
3. 3tsp cocoa powder
4. 1 1/3tbsp instant coffee powder
5. 1 tbsp gelatin - dissolved in 35ml warm water
6. 2 tbsp powdered sugar
7. 1 tsp vanilla extract

Steps :
**ONLY PREPARE THE FILLING WHEN THE CAKE IS COMPLETELY COOL**
1. Mix the cocoa powder and coffee powder with 2 tbsp boiled water, stir to mix well.
2. In a large mixing bowl, whisk the cream until stiff.
3. Add in the coffee and cocoa mixture, gelatin, powdered sugar and vanilla extract. Lightly stir it to mix well.

4. Spread the filling onto the first layer of cake.
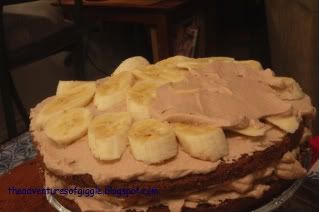
5. Place the banana slices on top of the filling.
6. Spread the filling again on top of the banana slices.
7. Repeat the same steps for the second layer.
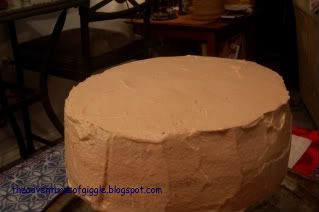
8. Cover the top layer and circumference with the filling.
9. Refrigerate at least 6 hours or overnight before proceed to next step.

C. Chocolate Glaze
1. 300g semi-sweet chocolate chips
2. 100ml whipping cream
3. 30ml evaporated milk
4. 1 tbsp unsalted butter

Steps :
1. Heat the chocolate, cream, milk and butter in microwave for 4~5 minutes or until it completely melted. Stir every 1 minute.

or

1. Heat up the ingredients with the doubled boiler until completely melted.

2. Lets the chocolate glaze slightly cool off.
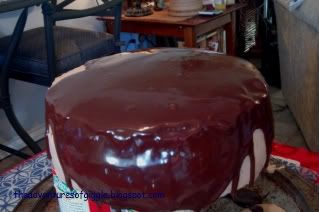
3. Slowly pour it on top of the chilled cake.
4. Quickly clean up the mess on the edge and return to chill immediately.
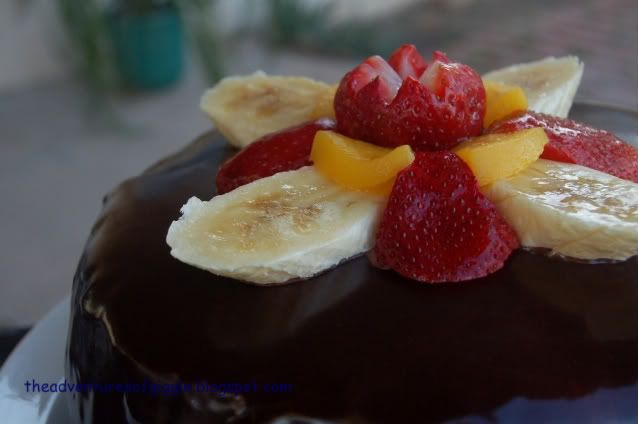
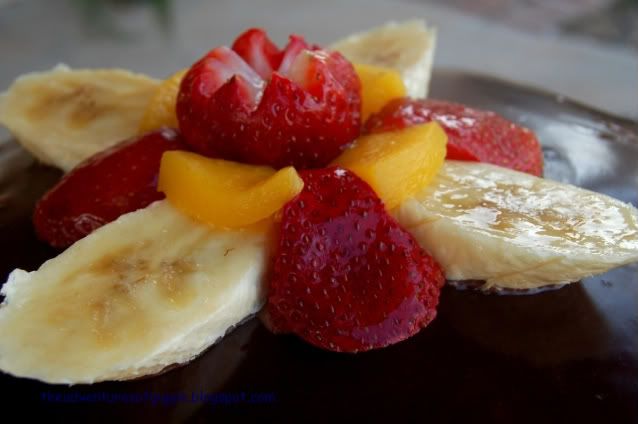
5. Decorate with some fruits.
6. Serve chilled!!! ENJOY!!!!!!!!!!

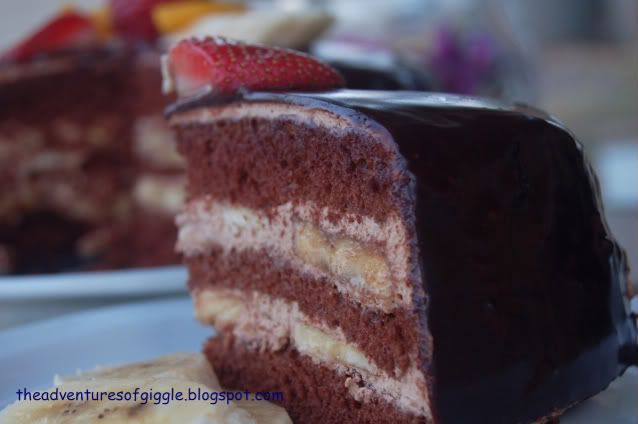
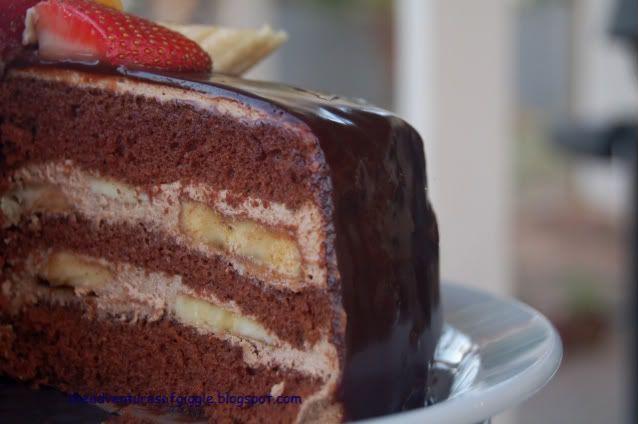
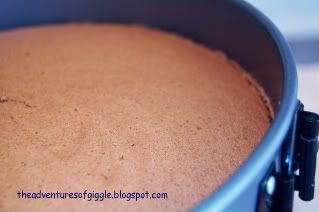
Freshly baked chocolate chiffon cake ---> Filling layers
PhotobucketBanana Chocolate Cake

Cake covered with filling --> Pouring chocolate glaze
PhotobucketPhotobucket

Sunday, March 29, 2009

Onion Bacon Quiche

Photobucket

Quiche (pronounce "keesh") is an open savory tart with the filling that made from eggs, cream, cheese, meat (bacon) or vegetables (spinach, tomatoes)..etc. Quiche is a French cuisine that usually served as brunch or a snack for picnic.

I was hesitant what to cook for my family in law's Xmas party in year 2007. Few days before the party, I was reading the newspaper while my mom in law preparing the breakfast, I got caught by a page with few holiday meal recipes. "Quiche" was the first thing that caught my eyes, I read over the ingredients and steps, then immediately decided to make it become one of the dishes for that party. The result turned out great. I made two 9" size, they were all gone while it was still warm.

Photobucket

When we are bored with an over easy egg or omelet for breakfast/brunch in the weekend, we will have quiche. It can be eaten in warm or cold. I like it better when it is warm.

The ingredients :

Crust :

1. 1 ready made 9" pie/tart crust (deep dish shell)

or

1. 180g all purpose flour
2. 1/2 tsp salt
3. 85g cold butter, cut to pieces
4. 45g margarine, cut into pieces
5. 3~4 tbsp iced water

**You may make extra crust and freeze it, just have to grab it out from the freezer whenever you want to make quiche**

Filling :

1. 6 slices bacon (can substitute with turkey bacon if you afraid pork bacon is too fattening)
2. 3/4 cup chopped onion
3. 1/4 chopped green onion (optional)
4. 2tsp olive oil
5. 2 large eggs
6. 2 large egg whites
7. 3/4 cup evaporated milk
8. 3/4 low fat milk
9. 2 tsp cornstarch
10. 1/2 tsp freshly ground black pepper
11. 1/4 tsp salt
12. 1/4 tsp ground nutmeg
13. 3/4 cup grated Gruyere cheese (or your preferred cheese)

Steps :

Crust (unless using ready-made deep dish)
1. Sieve the flour and salt into a mixing bowl.
2. Rub in the butter and margarine until the mixture resembles coarse breadcrumbs.
3. Stir in just enough water to combine.
4. Gather into a ball, wrap in cling firm and refregerate for 20 minutes.
5. Removed the chilled dough from the fridge and let it soften slightly at room temperature.
6. Roll out to a 3mm thick round piece, it has to be 50mm larger round than tart pan.
7. Transfer to a 9" tart pan and trim.
8. Prick the face all over with the fork.
9. You may decorate the edge with the fork or fingers.
10. Cover crust with aluminum foil and freeze for 1 hour before use.

Filling
1. Preheat the oven at 425F/218C
2. Cook the bacon slices until crspy. - crumble and set aside.
3. Saute the onion with olive oil until fragrant, stir in the crumbled bacon and green onion. Remove from heat and set aside.
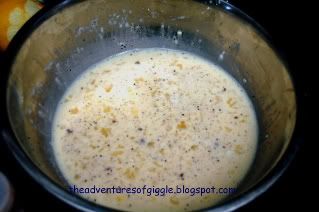
4. Whisk together the eggs and egg whites. Then add in evaporated milk, low fat milk, cornstarch, black pepper, salt, nutmeg. Whisk to combine.
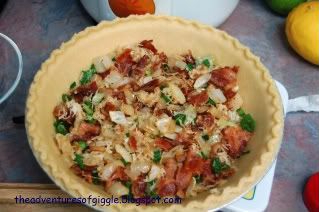
5. Mix grated cheese into cooled onion bacon mixture, then spoon the mixture into the crust.
6. Slowly pour the egg mixture in even layers.
7. Bake on the lower rack in preheated oven for 30~40 minutes or until the filling is set.
8. Best served warm.

Bacon Onion mixture in the crust, egg & mill mixture
Bacon Onion QuicheBacon Onion Quiche

Ready to bake --> ready to serve!!
Bacon Onion QuicheBacon Onion Quiche

Thursday, March 26, 2009

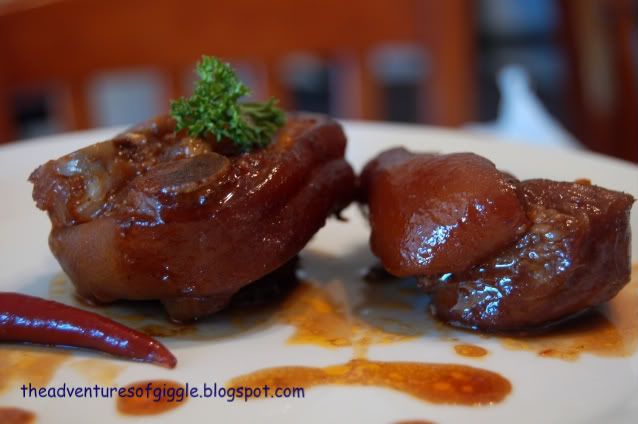
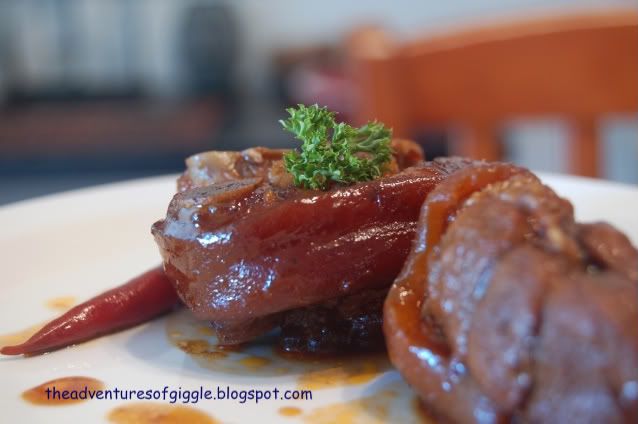
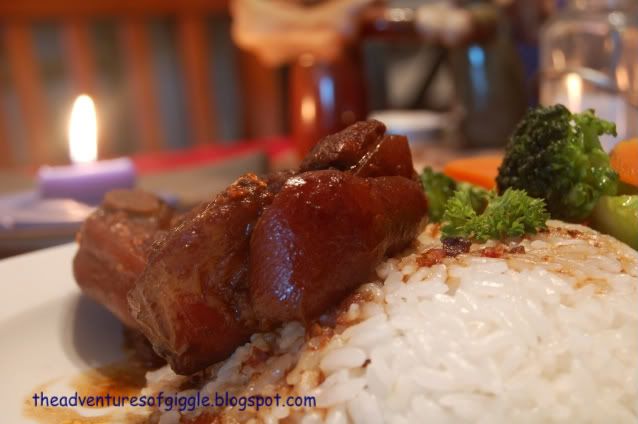
Spicy Soy Bean Paste Pork Front Leg

Pork Leg

When my family and friends in Malaysia heard that I cooked pork leg, they were surprised and wondered if Tom would eat it. Don't worry, Tom eats everything I cook except few things - bitter melon, thousand year egg/century egg (皮蛋) and salted egg. So, if he is mean to me, probably I will add some of these ingredients in his meal to punish him! Hehehe... :-p

Pork Leg

I learned to cook this dish from my mom and slightly modify the ingredients a little bit. It is super delicious to go with rice. Sometime, I will mix the gravy with dried version of cintan noodle... wow!! I tell you....I'm drooling just thinking about how it tasted.

Pork Leg

If you worry about the fat, pick the front leg, it is usually less fatty than the back leg.

Ingredients and steps :

1. 1kg pork front leg (hot water bath and rinse)
2. 4~6 cloves garlic - crushed
3. 2 tbsp of spicy soy bean paste (辣豆酱)
4. 3~5 dried chili - wash and unseeded
5. 1/2 tsp dark soy sauce
6. 500ml water, divided.
5. 1 pickled plum (酸梅子) - mashed
6. Few drops plum syrup to taste
7. 1~2 drops rice vinegar - optional


Steps :

1. Heat the non stick pot with some oil.
2. Saute the garlic until light brown,
3. Add in soy bean paste and dried chili, cook in medium heat until fragrant.
4. Add in pork leg and black soy sauce, stir over high heat until well coated.
5. Add in 250~300ml water, bring to boil, simmer with lid covered for 30 minutes. Stir occasionally for better cook.
6. Add pickled plum, few drops of syrup, vinegar (optional). Add some water** and simmer for another 20 minutes or until the meat is at your desired tenderness.

**Note : adjust the amount of water to be added according to your saltiness liking. It should be a bit saltier in order to go with rice.

Wednesday, March 25, 2009

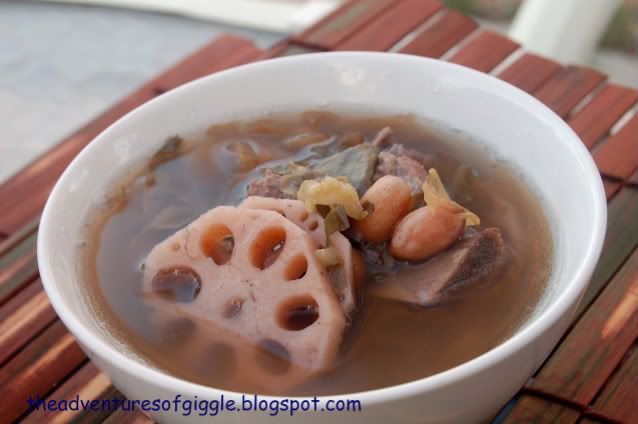
Lotus Root Soup

Photobucket

This is a "remarkable" dish in my culinary journey. Why? Read the story here. Now Tom says "ooh, tastes good, not burnt!" when I make this soup. "Sigh", I feel that I have amnesia recently. I keep forgetting things, and that makes me nervous. Not good!

Lotus roots have been found to be rich in dietary fiber, vitamin C, potassium, thiamin, riboflavin, vitamin B6, phosphorus, copper, and manganese, while very low in saturated fat. My mom and I used to add some peanuts and salted mustard to enhance the flavor. I will not stop cooking it even though it reminds me of the unpleasant experience. :-)

Ingredients :

1. 130g lotus roots - cut to 1/3" slices
2. 320g pork bones - wash thoroughly, bath and rinse with boiled water
3. 30g skinned peanuts - wash
4. 25g salted mustard cuts (梅乾菜) - wash thoroughly, soak in warmed water for at least 30minues to remove the preservative as much as possible.
5. 800ml water.
6. Salt to taste

Steps :

1. Boil the water.
2. Add in all the ingredients except salt.
3. Simmer for 45 minutes or until the peanuts reach your desire tenderness.
4. Salt to taste.
5. Skim the extra fat on top of the soup if necessary.
6. Serve warm.

Tuesday, March 24, 2009

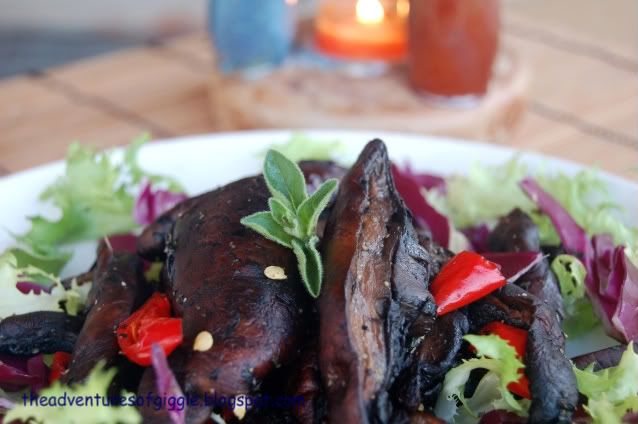
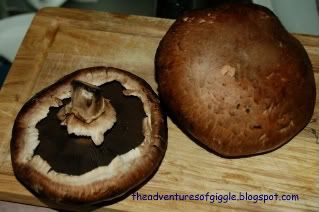
Butter Pepper Bella Cap Mushroom

mushroom
Errr....wonder what is this?? Ya, it is Bella cap mushroom, not so pretty the appearance after cooked, but delicious to eat.

I didn't like mushrooms at all when I was young until my old boss sent me to China for long stay for factory support. The cook in our hostel was from mainland China, so she didn't know much about seafood and meat. So, she cooked different kinds of vegetables for our daily meals. One of her signature dishes was stir fried fresh mushroom with some Chinese celery garnish. I didn't have too many choices, so I struggled to eat some at the beginning. When I got used to the taste for this dish, I started to love mushrooms. I cooked the same thing when I went back to Malaysia. It was an oriental style recipe.

This recipe actually came from the place at which I volunteer, a simple and easy western style mushroom dish. You can try it!

Photobucket

Ingredients :

1. 4~5 pcs Bella Cap mushroom - cut to 1/2" strips
2. 15g Butter
3. 1/4 tsp black pepper
4. some basil leaves or parsley flakes - optional
5. Garlic & Salt to taste
6. Some green and red chili for garnishing

Steps :

1. Melt the butter in a frying pan.
2. Add in mushroom strips, stir and cook for about 4~5 minutes or until the mushroom starts to shrink.
3. Season with the rest of the ingredients, cook for another 1~2 minutes.
4. Serve warm.

Monday, March 23, 2009

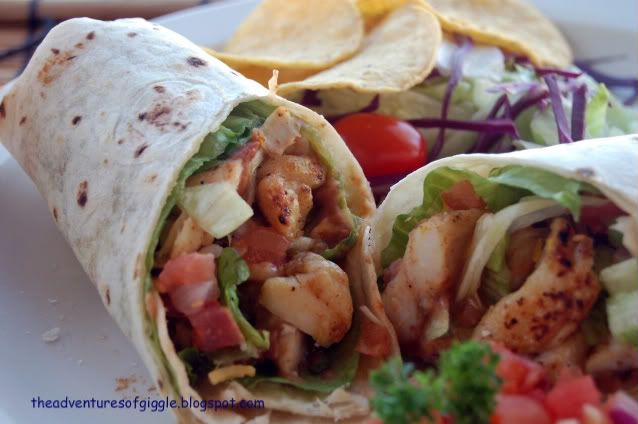
Easy Chicken Wrap

Chicken Wrap

When I feel too lazy to cook, a chicken wrap is always the first choice that comes to my mind. It is a quick and easy meal. I used to have some marinated chicken breast in my fridge for a quick meal like chicken wrap, fried rice or noodle, and easy spaghetti. I have a variety of types of seasonings kept in my pantry. I don't have any particular flavor for the chicken wrap, just mix and match with some seasoning I have in my pantry.

Chicken Wrap

Ingredients and Steps :

1. 280g boneless and skinless chicken breast. - cut to bite size strips, marinate for at least 3 hours with some salt and garlic powder, paprika powder, lemon zest, thyme and parsley flakes. You may make your own flavor chicken strips according to your preferred seasoning - it is flexible.
2. 3pcs of burrito size tortilla
3. Some chunky salsa - see recipe here

4. Some warmed re-fried bean (optional)
5. Few lettuce leaves
6. Some lettuce head shreds.
7. Some shredded cheese (optional)

Steps :
1. Pan fry the chicken strips in a slightly greased saute pan.
2. Cover the tortillas with aluminum foil, warm in the preheated (250F) oven for 3~5 minutes.
3. Place a lettuce leaf on tortilla, top with cooked chicken strips, shredded cheese, re-fried beans, chunky salsa, lettuce shreds.
4. Roll/fold up.
5. Serve with some tortilla chips and salsa. Enjoy!!!

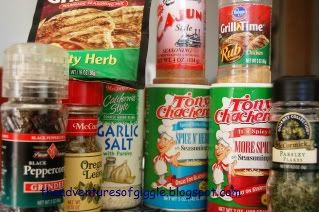
Some seasoning in my pantry.. , re-fried beans
Chicken WrapChicken Wrap

Warmed tortilla, ready to roll/fold!!
Chicken WrapChicken Wrap

Friday, March 20, 2009

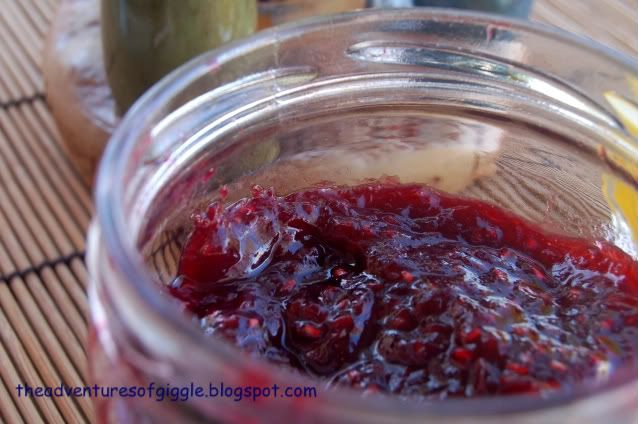
Raspberry Sauce/Jam

Photobucket

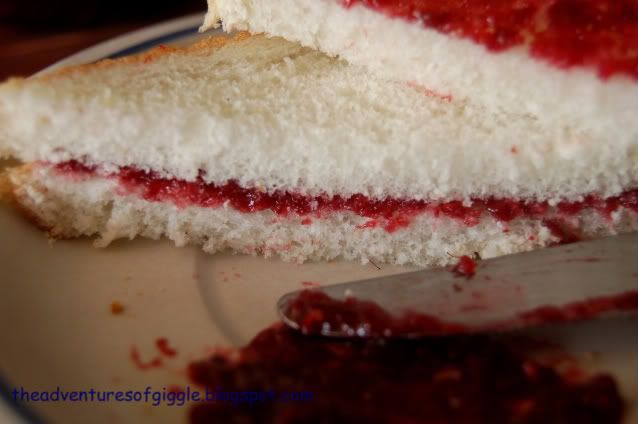
Do you like to spread some fruit sauce/jam on your toast? I do, and so does Tom and Cici. Isn't it nicer and healthier to make your own fruit jam? You can use them as the filling of the Swiss roll, crepe, or as the topping of the cake too. This is the sauce I used for my Raspberry Cheese Cake.

sauce

Here's the simple ingredients and steps. You may substitute with blackberry, blueberry or strawberry too. I also made some mixed berries (raspberry+blueberry+blackberry) at Tzu Chi yesterday, just love it!! :-)

Ingredients
1. 340g fresh raspberry
2. 50g cane sugar/brown sugar/rock sugar
3. 20g maltose (麦牙糖) - can be omitted if it is not available
4. 50g honey (can adjust to your preferred sweetness level)

Steps :

1. In a non stick sauce pan, simmer the raspberries for 30~40 minutes, smash the raspberries with a wooden spatula until it completely mashed.
2. Add in ingredient # 2 and #3, stir until dissolved.
3. Simmer for another 20~30 minutes, stir occasionally.
4. Remove from heat, leave to cool for 2~3 minutes.
5. Stir in honey, mix well.
6. When the sauce is completely cool, storage in a clean jar, cover tight and refrigerate.

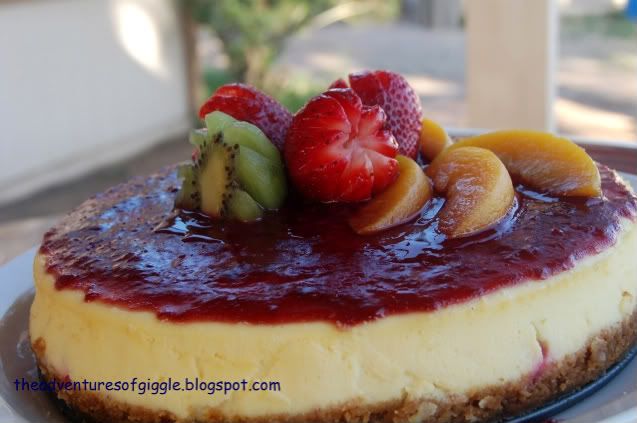
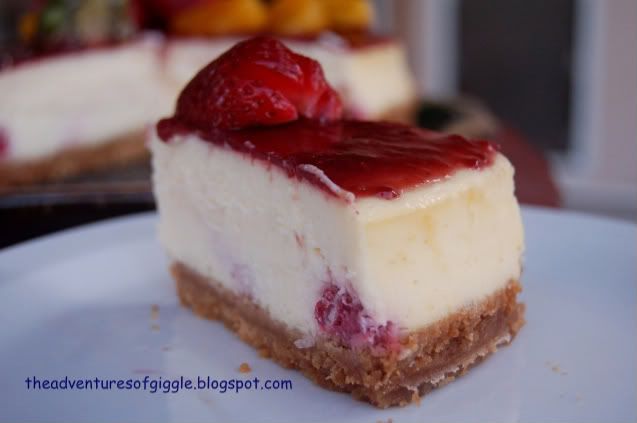
Raspberry Cheese Cake

Photobucket

Living in America is like being in dessert heaven. Those people with sweat tooth will be very pleased with the varieties of desserts available. The presentation and flavor are irresistible. However, I rarely dare to buy them from the shop - they are just too sweet or always have too much cream for me, but Tom like them very much.

Photobucket

I usually make sugarless cakes in order to keep him eating healthy as much as I can, and still enjoy the flavor of the cakes. I also made the raspberry sauce used in this recipe on my own, so I can control the amount of sugar in that too. You may get it at any supermarket or baking supply shop.

Photobucket

Ingredients and Steps :

A) Base Crust
1. 180g digestive biscuits (milled) OR 180g Graham Cracker Crumbs
2. 25g brown sugar
3. 113g butter - melted

B) Filling
1. 2 blocks (452g) Cream Cheese - at room temperature
2. 90g caster (white) sugar
3. 1/2 tsp vanilla extract
4. 27g corn flour (sieved)
5. 300ml whipping cream
6. 4 eggs - light beaten
7. 180g fresh raspberry (if using frozen raspberry, thaw before use)

C) Topping
1. 10g caster (white) sugar
2. 80ml water
3. 1/2 tbsp gelatin
4. 100g raspberry sauce/jam (I used my homemade one, will post the recipe soon)

D) Decoration
1. Some strawberries, peaches, kiwi or any kind of fruit you like.

Utensils needed
1. 8" spring form cake pan - for cheese cake
2. Bigger outer baking pan/tray - for hot water bath baking method. Fill in the boiled water before placing it into oven.

Steps :

A) Base
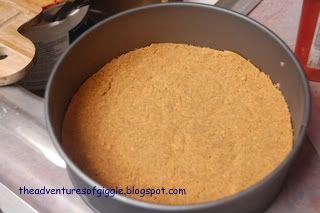
1. Combine all the dry ingredients. Add in melted butter, mix well.
2. Press firmly into the base of a 8" loose based cake pan.
3. Refrigerate until firm.

B) Filling
1. Preheat oven at 300F/150C.
2. In a mixing bowl, whisk cream cheese with your electric mixer until smooth.
3. Add in vanilla extract, sugar, sieved corn flour then whisk until smooth.
4. Slowly stir in whipping cream, mix well.
5. Add in beaten egg, mix to just combined.
6. Pour half of the cheese mixture into the cake pan.
7. Arrange raspberries on the cheese mixture.
8. Slowly pour in the rest of cheese mixture.
9. To prevent the hot water seeping into the removable bottom, wrap with aluminum foil completely around the bottom and half way up the side of the cake pan. (I forgot this step but my cheese cake base turned out ok, must make sure the bottom and ring are tighten properly.)
9. Place cake pan in hot water bath, bake in preheated oven for 60~70 minutes or until filling is set.
10. Turn off the heat. Let the cake sit in the oven for 30 minutes with door closed.
11. Remove the cheese cake from oven, leave cool for 2~3 hour at room temperature then refrigerate overnight.
12. Carefully run a knife around the edge, check if any area stick, slowly lift up the ring.
13. Spread the topping sauce (see step C) and decorate with some fruits.
14. Cover and refrigerate.
15. Serve chilled.

C. Topping
1. Combine sugar, water and gelatin.
2. Cook the mixture over medium heat, stir frequently until sugar and gelatin dissolved completely.
3. Add in raspberry sauce, stir to mix well.


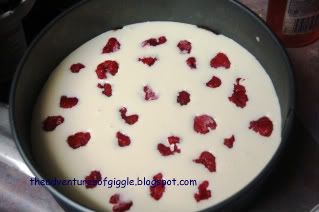
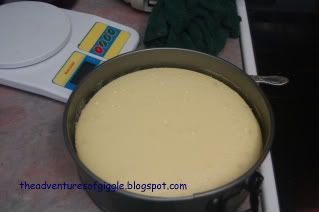
Base Crust, cheese mixture and raspberries
PhotobucketPhotobucket

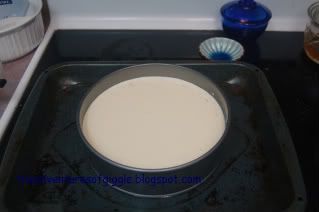
Hot water bath baking method, ring lifting
PhotobucketCheese Cake

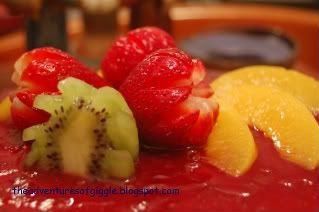
Spread topping, fruits decoration
Cheese Cakecheese cake

Wednesday, March 18, 2009

Prok Ribs Curry

Curry
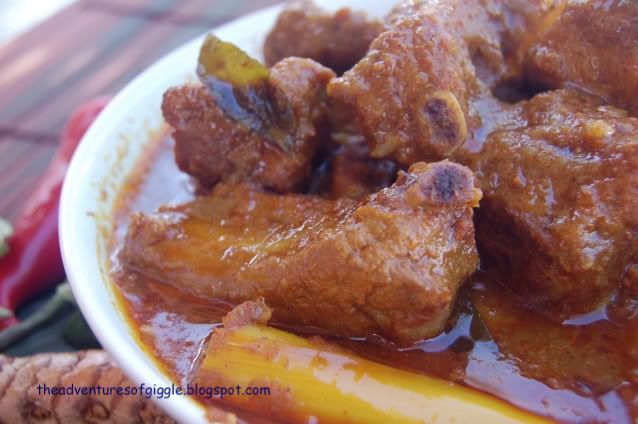
Curry Pork Ribs

Curry is very popular in Malaysia. There are 3 major races in the country. You can find a variety of curries served in our daily meals. Indian style, Malay, Chinese or Nyonya, each of them has their own specialty of taste and flavor. I love curry very much. I used to cook seafood curry while I was in Malaysia because the seafood ingredients are fresh and not expensive.

The choices of the fresh seafood in Arizona are limited and expensive. So, most of the time, I would just cook curry chicken or pork rib to serve with Nasi Lemak (coconut rice).

Photobucket
Curry Pork Ribs

Besides the Pandan Layer Cake, I have also made some curry pork ribs for the Pot Luck Party on last Saturday. As some of the guests are vegetarian, I split the curry gravy to cook with some vegetarian mutton so that everyone had the chance to taste it. I made my curry with a less intense flavor because most of them are Taiwanese, they might not used to the strong and spicy curry that I usually cook.

Curry
Curry Vegetarian Mutton

In following ingredients, you will find I used 2 types of curry powder/paste. The Kapitan curry powder has stronger and spicy taste, usually done in just little gravy, mixing with Rendang curry paste is my own version of curry that everyone likes. You may try it.

Ingredients :

A)
1. 2kg Pork ribs - marinate with 2 tbsp Kapitan curry powder and 1/4 tsp salt.
2. 3pcs potato - cook seprately with until tender, peel and cut to 1.5" chunks

B)
1. 1 pack (75g) Kapitan curry powder - mix 2tbsp of powder with 1/4 tsp salt - rub with the pork ribs for evenly coated. Mix the rest of the powder in a bowl of 20ml water.
2. 1 pack (50g) Rendang curry paste.
3. 500g shallot - blended
4. 10g fresh turmeric - blended with shallot
5. 1 stalk of lemon grass - cut to 2 or 3 pieces 2.5" length, cracked.
6. 6~8 curry leaves
7. 1 tsp lime juice
8. 2~3 kaffir lime leaves
9. 60ml coconut milk
10. salt to taste
11. Some water (adjust according to your preferred curry gravy)

Curry

Steps :

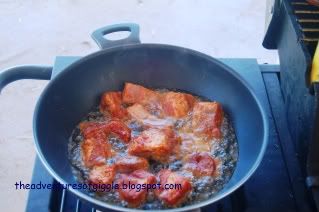
1. Quick fry the pork ribs for 1 minutes each side. Set aside.
2. Cook the onion and turmeric mixture in 2~3 tbsp red-hot cooking oil for 4~5 minutes or until fragrant.
3. Add in Kapitan curry mixture and Rendang curry paste, lemon grass and curry leaves. Stir and fry for 5 minutes. Add in some more oil and adjust the heat to prevent burning.
4. Add in quick prefried pork ribs. Stir and cook for another 5 minutes. Adjust the heat to prevent burning.
5. Add water, bring to boil, add the precooked potato chunks. Simmer covered until the meat reach your preferred tenderness.
6. Add in coconut milk, lemon juice and salt to taste.
7. Turn off the heat, and immediately add in the kaffir lime leaves. Don't cook the leaves, it will make your curry bitter.
8. Skim the extra oil on the top the curry gravy.

CurryPhotobucket

CurryCurry

Tuesday, March 17, 2009

Chunky Salsa

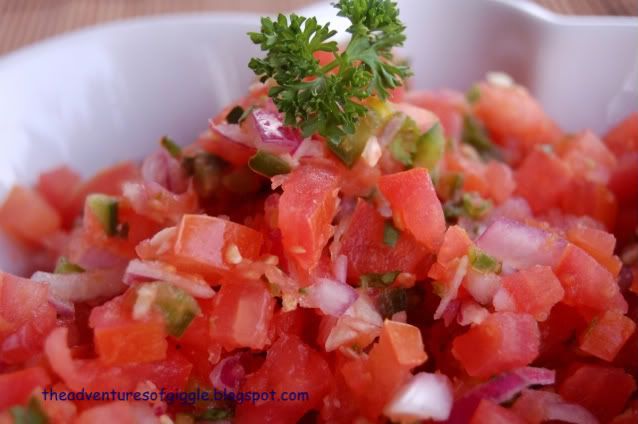
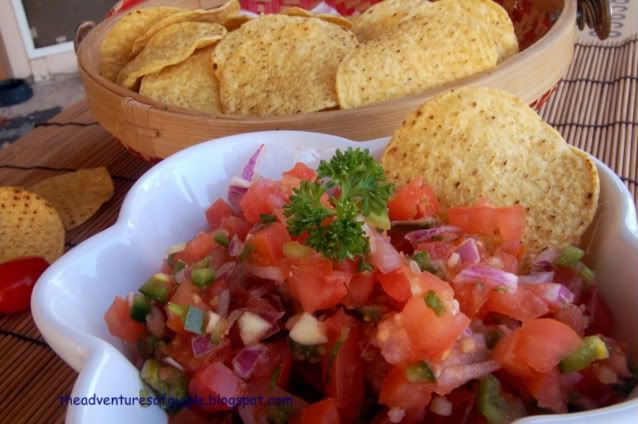
Chunky Salsa

Once, we were doing the grocery shopping as usual. Tom, my super sexy husband, wanted to buy a jar of salsa. I looked at the ingredients label and found that it is actually not hard to make. In America, salsa is normally refers to Mexican tomato based sauce that serve as dip for the chips or sauce for variety of Mexican wraps like burrito, taco..etc. The others ingredients are lime juice, jalapeno pepper, onion, garlic, cilantro...etc. These are all can be easily obtained in any supermarket. So, why spend more money for a jar of salsa? Isn't that healthier to have the fresh homemade food?

Chunky Salsa


You may also add some salsa when seafood dishes are served, this refreshing sauce will improve the freshness and taste of the seafood.

Ingredients and Steps :

1. 2 medium size tomatoes
- halve, remove the inner juicy flesh and place in a blender container to make tomato juice. Cut the remaining outside flesh and skin into to chunks.
2. 1 jalapeno pepper (Malaysian can use chili padi) - finely chop
3. 2 tbsp chopped onion
4. 1 clove minced garlic
5. 1 tsp fresh chopped cilantro
6. 1 tbsp fresh lime juice
7. a little bit grated lime zest
8. salt to taste
9. white vinegar to taste (optional)

Mix all the ingredients in a container, cover and refrigerate at least 2 hours before serving.

Chunky SalsaChunky SalsaChunky Salsa

Chunky SalsaChunky Salsa
Related Posts Widget for Blogs by LinkWithin